Boy Scout Troop 22
Kihei, Maui, Hawai'i
Maui County Council, Boy Scouts Of America
Scouting In Paradise
Photography Merit BadgeWhen we first started work on this merit badge, the troop library didn't yet have a copy of the merit badge book, and much to our surprise neither did the Council office. So, we assembled the material you might have found in the book, below. We've left this page available for historical purposes, and in case it's of use to other scouts. Requirements (2006)
1) Explain how the following elements and terms affect the quality of a picture: 2) Explain the basic parts and operation of a film camera or digital camera. Explain how an exposure is made when you take a picture. 3) Discuss with your counselor the differences between a film camera and a digital camera. List at least five advantages and five disadvantages of using a digital camera versus using a film camera.
4) Do ONE of the following:
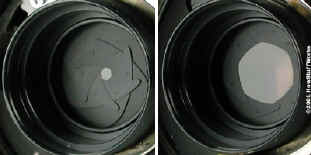
5) Discuss with your counselor the career opportunities in photography. Pick one that interests you and explain how to prepare for such a career. Discuss with your counselor the education and training such a career would require. Let's talk about the requirements:1) Photographic Terms/QualitiesIf the text below doesn't answer a question for you, this site should be able to. Light: Direct sunlight will generate dark shadows. The direction of the light will place those shadows in unattractive positions underneath the subject's eyes and nose. One solution is to move the subject into the shade where he will be lit by skylight rather than sunlight. Skylight comes from a large source and is therefore diffuse. Diffuse light does not cast strong shadows. Portable camera flashes, by contrast, have very small light-producing areas and, therefore, produce very hard-edged light with pronounced shadows. Flash units also tend to be mounted right next to the camera lens, producing an unnatural look. How often do you see the world illuminated by light emanating from your head? You probably don't - unless you're wearing a caving helmet or a head-mounted camping light. Light tends to come from overhead sources - the sun, ceiling lamps, etc. The easiest way to soften the lighting in your flash photos is to bounce the light from the flash unit off a large white surface. Walls and ceilings work for this, as do portable folding reflectors. You can also buy diffusers that attach to your flash that help a little bit as well. Exposure: Aperture affects the depth of field and therefore which portions of the image will be in focus. Shutter speed affects how much movement appears. Aperture is the degree to which the iris or diaphragm inside the lens is opened. Lenses are designed to gather as much light as possible. The diaphragm is just like the iris in your eye; it can be closed ("stopped down") to block off a portion of the light coming through the lens. A lot of work went into making a lens good at gathering light. Why would you want to throw away some of that? The first reason to stop down a lens is that the world might simply be too bright. If you're using high-speed (sensitive) film and have a slow shutter that must expose the film for at least 1/500th of a second, using a smaller aperture is the only way to prevent too much light from striking the film and overexposing it. A more interesting reason is for control of sharpness. Suppose the lens has a maximum aperture of f/2. The depth of field will be shallow. Only the object on which you focussed will be sharp. Things closer or farther from the camera will be out of focus. The range of distances for which objects are acceptably sharp is called the "depth of field". Notice the word "acceptably" in the definition. What is acceptable in an 8x10 print viewed from across the room may not be acceptable in the same print viewed at arm's length. What is acceptable in an 8x10 print viewed at arm's length may not be acceptable in a 30x40 print viewed at arm's length. If you want more objects in the scene to be acceptably focussed, you have to stop down the lens to a smaller aperture.
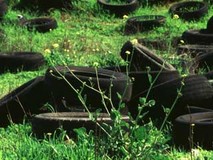 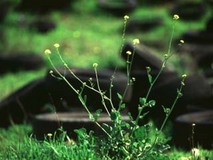 Depth Of Field: (Left) Narrow Aperture Increases Depth, (Right) Wide Aperture Decreases Shutter Speed: As long as neither the camera nor subject is moving, the shutter speed a camera selects doesn't matter too much. If they are standing up, most subjects won't be able to hold still for a 1/2 second exposure. If the built in meter shows the shot is under exposed, the photographer should open the aperture until the shutter speed is 1/15th second or faster. If the photographer is handholding the camera (not using a tripod), the 1/15th of a second exposure will likely result in a lot of camera shake showing in the picture. When using a normal lens, the general rule is to use shutter speeds of 1/60th or faster. Longer lenses magnify the subject but they also magnify camera shake. The traditional rule for handheld photography is to use shutter speeds of at least 1/focal-length. So if you've got a 250mm lens you'd use shutter speeds of 1/250th or faster. You should use faster speeds if you intend to make big enlargements from your originals. You can get away with slower shutter speeds if you either (1) brace yourself against a solid object, (2) rest the camera/lens on a solid object
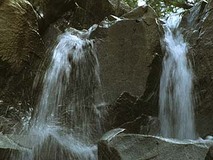 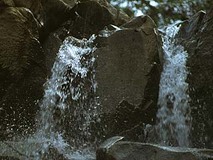 Shutter Speed: (Left) Long Exposure shows movement, (Right) Short exposure stops movement
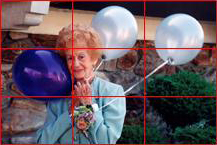
Composition:
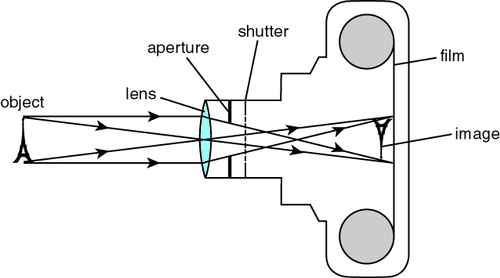
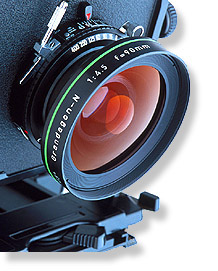
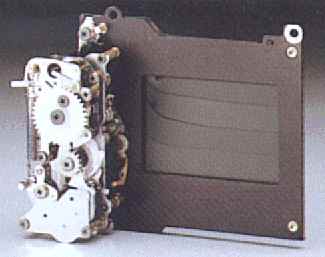
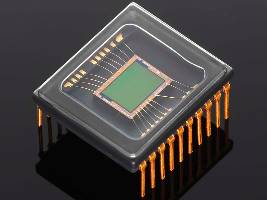
2) Basic Parts and Operation of Film and Digital Camera
     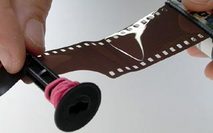
3) Digital vs. Film Cameras
The main differences between a digital and film camera:
Digital Advantages:
4) The Picture StoryIdeally, this will include around 8 photos glued or taped to a poster board, with captions under each to tell the story. Good photo story ideas include: the parts of a troop meeting; a boy scout parade; a day at the fair; a day in the life of a pet dog/cat. 5) Careers in PhotographyEach scout should make a 2 minute oral presentation on a career in photography. You can find info at California Occupational Guides, including Photographer; Photo finisher; Technician; Film editor. What training do I need? Where do I look for a job? What do I do on the job? How much can I make? |
Contents ©2009 Troop 22 ~ All rights reserved